Mastering Knurling in SketchUp: Elevating 3D Designs with Precision

In the dynamic realm of 3D design, every detail matters. Achieving precision and realism in your models often comes down to the finer elements, and one such detail that adds both functionality and aesthetics is knurling.
Understanding the Significance of Knurling
Knurling is a machining process that involves creating a textured pattern on the surface of an object, typically for improved grip or a decorative effect.
In the world of 3D design, knurling adds a tactile quality to objects, making them more visually appealing and functional. Whether you're designing tools, machinery components, or even decorative elements, mastering knurling techniques in SketchUp can make a substantial difference in the overall quality and realism of your models.
Tools for Knurling in SketchUp
While SketchUp is renowned for its user-friendly interface, achieving intricate details like knurling requires a strategic use of its native tools. Let's explore the primary tools that can be harnessed for effective knurling in SketchUp:
A. Push/Pull Tool:
The Push/Pull tool is fundamental in creating the initial geometry for knurling. Use this tool to extrude a cylindrical or prismatic shape, setting the foundation for the knurling pattern.
B. Follow Me Tool:
The Follow Me tool is a powerful asset for creating complex shapes by extruding profiles along a path. When used in conjunction with a knurling profile, it allows for the seamless generation of knurled surfaces around cylindrical or curved objects.
C. Offset Tool:
The Offset tool is instrumental in creating concentric circles or other patterns that form the basis of knurling. It helps establish the spacing and depth of the knurling grooves.
D. Rotate Tool:
Precise rotation is key to achieving an authentic knurling pattern. The Rotate tool enables users to accurately position and replicate knurling elements around the surface of a cylinder or other shapes.
E. Scale Tool:
The Scale tool allows for adjusting the size of knurling features, providing flexibility in creating variations in the pattern. This tool is particularly useful for customizing the appearance of knurled surfaces.
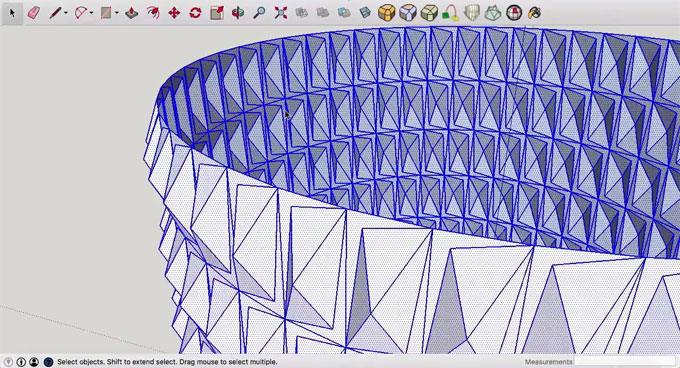
Techniques for Knurling in SketchUp
A. Establishing the Base Geometry:
Begin by creating the base geometry for knurling using the Push/Pull tool. This could be a cylinder, a prismatic shape, or any object that requires a knurled surface. Ensure that the base geometry is proportionate to the overall design.
B. Designing the Knurling Profile:
The knurling profile is the cross-section of the knurled pattern. It typically consists of a series of ridges and grooves. Use the Line and Arc tools to sketch the desired knurling profile. This profile will be extruded along the base geometry using the Follow Me tool.
C. Extruding the Knurling Profile:
Select the knurling profile and activate the Follow Me tool. Click on the base geometry or path that you want to extrude the profile along. This action will create the initial knurled surface. Adjust the spacing and depth of the knurling grooves by using the Offset tool on the extruded surface.
D. Replicating the Knurling Pattern:
To cover the entire surface, use the Rotate tool to replicate the knurling pattern around the cylindrical or prismatic object. Ensure precise alignment and spacing between each repetition. The Scale tool can be employed to modify the size of knurling elements, providing a realistic and varied appearance.
E. Fine-tuning the Details:
Zoom in and fine-tune the details of the knurling pattern. Adjust the spacing, depth, and size of the knurled features as needed. This level of attention to detail ensures a high degree of realism and accuracy in the final design.
Tips for Mastering Knurling Techniques in SketchUp
A. Utilize Components:
Convert the knurling pattern into a component to streamline the replication process. This allows for easy modification of a single instance, automatically updating all other instances of the knurling component throughout the model.
B. Experiment with Different Profiles:
Knurling patterns come in various styles, and the profile you choose greatly influences the final appearance. Experiment with different ridge and groove configurations to achieve the desired aesthetic for your project.
C. Pay Attention to Scale:
Ensure that the scale of your knurled pattern aligns with the overall size of your model. Avoid patterns that are too large or too small relative to the object they adorn.
D. Consider Material Application:
In addition to the geometry, the material applied to the knurled surface contributes to its realism. Experiment with materials to achieve the desired texture and reflectivity for the knurled pattern.
Real-world Applications of Knurling in SketchUp
A. Industrial Design:
In industrial design, knurling is frequently used on tools, handles, and mechanical components. SketchUp's knurling techniques enable designers to accurately replicate these features, providing a realistic representation of how the object will look and feel in the physical world.
B. Automotive Design:
Knurling plays a role in automotive design, especially on components like knobs, levers, and controls. SketchUp's knurling tools allow automotive designers to create detailed and accurate representations of these features, contributing to the overall authenticity of the vehicle model.
C. Consumer Products:
For consumer products such as electronics, appliances, or accessories, knurling adds a touch of sophistication and functionality. SketchUp's knurling techniques are invaluable for product designers seeking to convey a sense of precision and quality in their models.
Future Trends and Developments
As SketchUp continues to evolve, we can anticipate further enhancements and features that cater specifically to knurling and intricate detailing. Some potential trends and developments include:
A. Advanced Knurling Presets:
Future updates may introduce advanced knurling presets that offer a selection of predefined patterns commonly used in different industries. This could streamline the design process, especially for those who are new to knurling techniques.
B. Integration with Materials and Textures:
Enhancements in material and texture capabilities within SketchUp could provide more realistic representations of knurled surfaces. Improved rendering options might allow designers to showcase the tactile qualities of knurled patterns more convincingly.
C. Parametric Knurling:
The integration of parametric design features could enable users to dynamically adjust the parameters of knurled patterns, allowing for real-time modifications and customization. This would provide greater flexibility in adapting knurling to specific design requirements.
To learn more, watch the following video tutorial.
Video Source: SketchUp
Conclusion
In conclusion, mastering knurling techniques in SketchUp is a valuable skill that can elevate the quality and realism of your 3D designs. From industrial tools to consumer products, the artful application of knurling adds a level of detail that enhances both form and function.
By utilizing SketchUp's native tools strategically, designers can create intricate knurled patterns with precision and efficiency. The flexibility offered by tools like Push/Pull, Follow Me, Offset, Rotate, and Scale allows for creative experimentation and customization.
As the design landscape continues to evolve, SketchUp's commitment to innovation ensures that knurling techniques remain at the forefront of 3D modeling. Whether you are a seasoned professional or a newcomer to the world of 3D design, exploring the possibilities of knurling in SketchUp opens up a realm of creative opportunities, allowing you to infuse your models with a level of sophistication that sets them apart. As the demand for detailed and realistic 3D representations grows, mastering knurling becomes not just a skill but a distinctive element that defines the excellence of your designs.