Designing Your Dream Music Studio with SketchUp: A Step-by-Step Guide

Creating a music studio that perfectly aligns with your artistic vision and technical requirements is a thrilling endeavor. With advancements in technology, architects, interior designers, and musicians alike are turning to powerful 3D modeling tools to bring their ideas to life.
Among these tools, SketchUp stands out as an intuitive and versatile platform for designing spaces with precision and creativity.
Understanding Your Requirements
Before diving into SketchUp, it's crucial to have a clear understanding of your requirements. Consider the type of music you will be producing, the equipment you need, the size of the studio, and any acoustic considerations.
Sketch out a rough floor plan and jot down essential features, such as instrument placement, recording booth location, and control room layout.
Getting Started with SketchUp
Downloading and Installing SketchUp:
Start by downloading the latest version of SketchUp from the official website. Follow the installation instructions for your operating system.
Choosing the Right Template:
When launching SketchUp, select the appropriate template. For a music studio, the "Architectural Design - Millimeters" or "Feet and Inches" template might be suitable, depending on your preferred unit of measurement.
Creating the Basic Floor Plan
Drawing the Walls:
Use the Line tool to draw the outer walls of your music studio. Input precise dimensions and angles to ensure accuracy. Employ the Rectangle tool to create rooms and spaces within the studio.
Adding Doors and Windows:
Utilize the Rectangle and Push/Pull tools to create openings for doors and windows. SketchUp's extensive 3D Warehouse offers a wide array of pre-made components that can be easily inserted into your design.
Customizing the Interior Layout
Placing Instruments and Equipment:
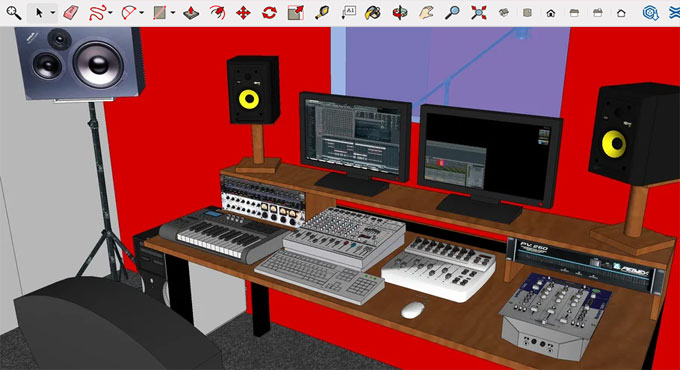
Explore the 3D Warehouse for accurate models of musical instruments, studio furniture, and recording equipment. Drag and drop these components into your model, and arrange them to reflect your ideal setup.
Adjusting Room Layout:
Use the Move and Rotate tools to experiment with different arrangements. Consider the flow of the space, ensuring that instruments and equipment are strategically placed for optimal functionality and aesthetic appeal.
Focusing on Acoustics
Integrating Acoustic Elements:
Designing a music studio involves careful consideration of acoustics. SketchUp allows you to model acoustic panels, diffusers, and bass traps. Experiment with their placement to achieve the desired sound quality in your studio.
Testing Sound Paths:
Leverage SketchUp's audio analysis plugins or extensions to simulate sound propagation within your studio. This can help identify potential acoustic issues and refine your design accordingly.
Creating Specialized Spaces
Designing Recording Booths:
If your music studio requires recording booths, use SketchUp to design soundproof spaces with proper dimensions. Ensure that the doors and windows are strategically placed to minimize sound leakage.
Crafting Control Rooms:
Design the control room with precision, considering the placement of mixing consoles, monitors, and other essential equipment. Use SketchUp to visualize the line of sight from the control room to the recording area.
Refining the Aesthetics
Choosing Finishes and Materials:
SketchUp allows you to experiment with different materials and finishes for walls, floors, and ceilings. Consider how these choices contribute to the overall aesthetic of your music studio.
Playing with Lighting:
Experiment with different lighting scenarios using SketchUp's lighting tools. Adequate and strategically placed lighting is essential for both functionality and ambiance in a music studio.
Adding Realism with Rendering
Selecting a Rendering Extension:
Enhance the realism of your SketchUp model by using rendering extensions like V-Ray or Twilight Render. These tools simulate natural lighting and textures, providing a lifelike representation of your music studio design.
Adjusting Rendering Settings:
Fine-tune rendering settings to achieve the desired level of detail and realism. Experiment with different camera angles and views to showcase various aspects of your design.
Reviewing and Iterating
Gathering Feedback:
Share your SketchUp model with collaborators, clients, or fellow musicians to gather feedback. Use SketchUp's collaboration features or export images for presentation.
Making Iterations:
Based on feedback, make necessary adjustments to your design. SketchUp's parametric modeling capabilities allow you to easily modify dimensions and layouts.
To learn more, watch the following video tutorial.
Video Source: Jason Baliban Productions
Exporting and Implementing
Exporting 2D Plans
Use SketchUp's layout feature to create 2D plans and elevations for construction purposes. These documents provide contractors with clear guidelines for implementing your design.
Exporting 3D Models:
Export your 3D model in a format compatible with construction software or virtual reality platforms. This facilitates a seamless transition from the digital design to the physical realization of your music studio.
Conclusion
Designing a music studio with SketchUp is a rewarding process that combines creativity with technical precision. By following this step-by-step guide, you can leverage the full potential of SketchUp to bring your dream studio to life.
From the initial conceptualization to the final export for implementation, SketchUp provides a comprehensive toolkit for architects, designers, and musicians to collaborate and create spaces that inspire innovation and musical excellence.